It’s been two and a half years since I installed a CERV2 in my home located in Western New York. I wrote an article for the newsletter back then: Taylor Home CERV2 Testimonial. My original article covered the analysis of my home, retrofitting the install of the CERV2, and early performance results of the system. I found many of my assumptions to be true and a few that were slightly off. I’d like to share the lessons I’ve learned and to showcase some of the changes I’ve made.
Let’s start with changes that I have made. My house has always been fully electric but I have made it a priority to upgrade outdated mechanicals. I started with the HRV to CERV2 upgrade. I then made a financial commitment in an electric vehicle (EV). It then made sense to take advantage of solar incentives and net-metering to install a roof-mounted solar array to achieve a net-zero home. I replaced the 18 kW/h tankless water heater and 5 kW/h dryer for a heat pump water heater and a heat pump ductless dryer. During a remodel of my master bathroom, I ducted the CERV2’s return directly into the shower exhaust fan so that heat and moisture can be intelligently exchanged rather than lost.
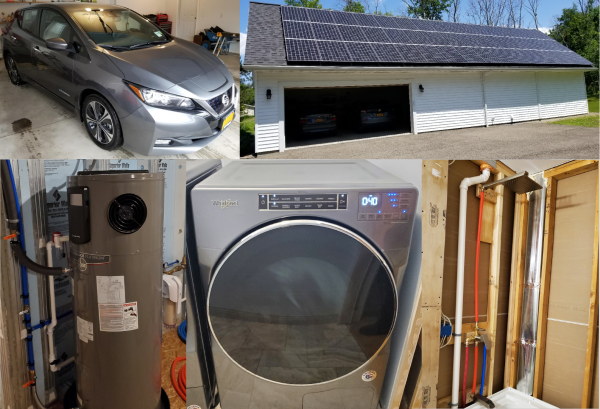
These upgrades have reduced my yearly energy usage by more than 2,000 kW. That same amount of energy can propel my EV more than 6,000 miles. These savings will free up more capacity on my solar array and ultimately set me up to trade my last conventional vehicle for another EV.
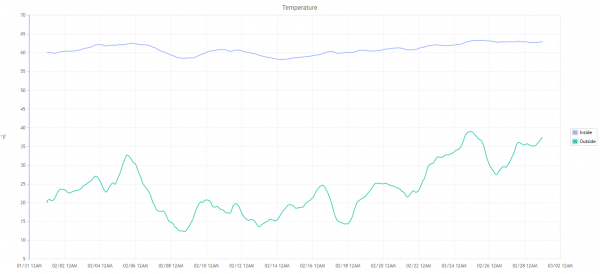
The last change needed was to reduce my dependence on the 5 kW/h auxiliary duct heater in the winter. I accurately calculated that the CERV2 could alone heat the house at an outdoor temperature greater than 45° F. However, the indoor temperature would reach a little on the cool side for my preference. I found that it would level out around 62° F. I find myself to be more comfortable around 67° F.
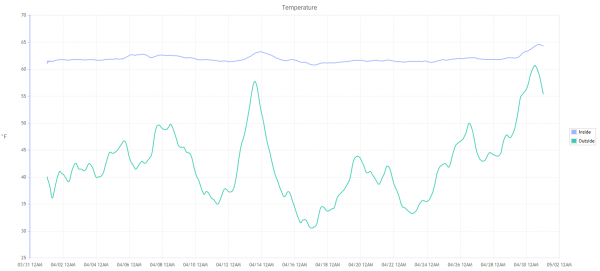
In the deep winter months: Dec – Feb, the auxiliary duct heater is running nearly constantly. I set the output temperature to 113° F. This was to balance comfort, solar capacity, and energy consumption. On a sub-20° F week it will pull nearly 3 kW/h to maintain an indoor temperature near 62° F. I could push it harder but didn’t want to tip the scales past what my solar would generate for the year. I significantly under-estimated my comfort level and the house’s heating load. I believe a more accurate heating load for my house is in the 15-20k BTU/h range.
The summer months are generally well handled by the CERV2. However, the number of abnormal stretches of 80-90° F weather is becoming more common. The CERV2 can maintain reasonable temperature through these stretches. However, less under control are elevated indoor humidity levels, which can reach as high as 70% RH. Unfortunately, indoor air at 74° F and 70% RH makes for uncomfortable sleeping conditions.
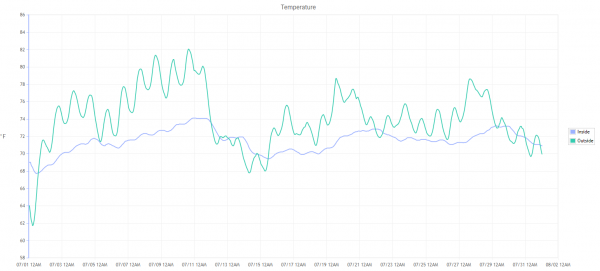
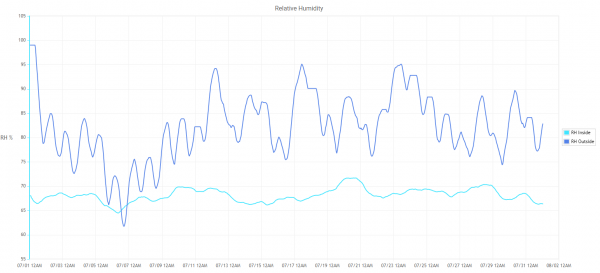
What can be done to help solve these energy and comfort problems? The solution I preferred was to integrate a mini-split to reduce the energy consumption in the winter and add more conditioning in the summer. I will be honest, I wasn’t in love the idea of maintaining equipment that resides outside, in the elements, in the blizzards, in the rain storms. But, in order to obtain the surface area necessary to deliver 15-20k BTU/h of air-to-air heat transfer, an outdoor unit is the only practical way. Luckily heat pump adoption is increasing across the country, modern refrigerants are less damaging to the environment, they operate amazingly in extreme temperatures, parts are relatively easy to find, maintaining the outdoor unit is simple, the Cost vs. ROI of the unit is highly favorable, and it’s a surprisingly easy DIY.
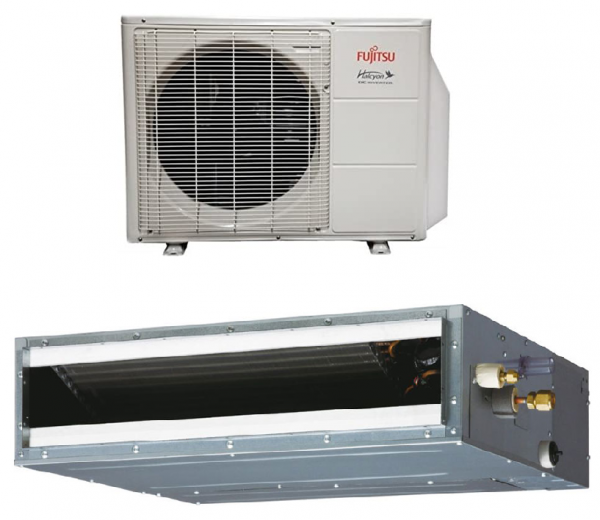
I opted to go with a ducted mini-split and integrate it directly into the CERV2’s indoor air stream. I will share the story of my DIY install and the preliminary results from the tail end of the summer. Before I jump in, I want to point out that many great articles have already been written on the topics of mini-split selection, mini-split integration, and humidity management. I highly recommend you check out these articles if you haven’t already:
- Mini-split Mania
- CERV2 Retrofit: New Lungs for a 101-Year-Old Home Series
- Handling Humidity Report Series
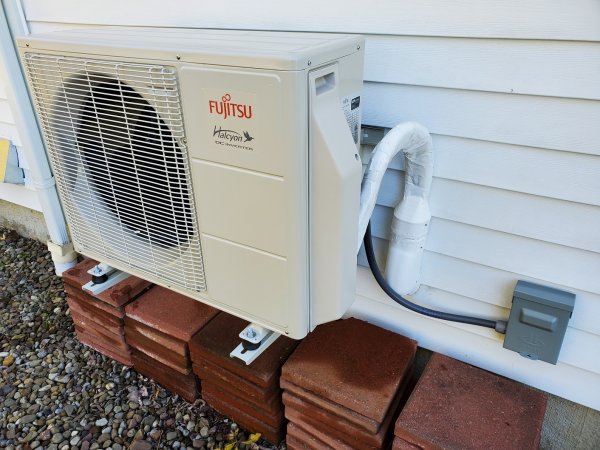
I am installing the ducted mini-split with Build Equinox’s Magic-Box Mechanicals. The CERV2 has built in algorithms for both Mitsubishi and Fujitsu low-temperature heat pumps. Both manufactures offer comparable products and I ultimately went with the brand I could find at the lowest price. That turned out to be a Fujitsu 1 ton (12k BTU/h cooling, 16k BTU/h heating) unit. It’s rated for full capacity at 20° F and can operate down to at least -5° F. It has a rated Coefficient of Performance (COP) of 3.60, which means 1 kW/h of input power will result in the equivalent of 3.6 kW/h of resistance heating. The resistance duct heater often used 75-100 kW/day, while this mini-split should use less than 30 kW/day and obtain similar heating capacity.
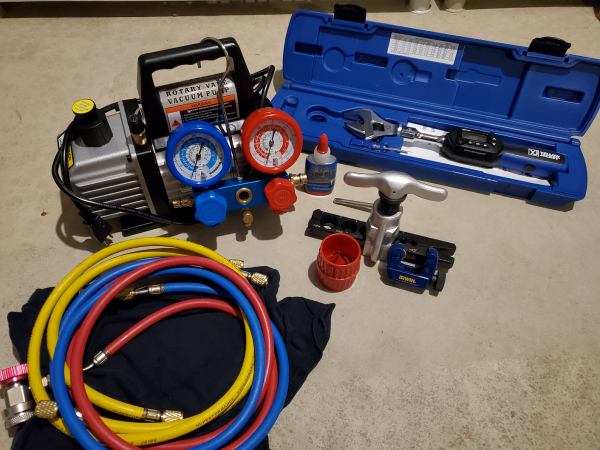
I started with relatively little knowledge about how to install a mini-split. I found a super helpful video that I will link here (available as-of Nov 2021): Full Installation of Mini Split Ductless Unit. Ty Newell from Build Equinox also wrote a great tech guide here: Installing a Ductless Mini-split. The number of tools involved can be fairly daunting. I made sure to pick up a torque wrench, gauge set, vacuum pump, flaring tool, and a R410a vacuum port adapter. Please note, depending on your jurisdiction, you may be required to complete a refrigerant certification course or have a certified professional present.
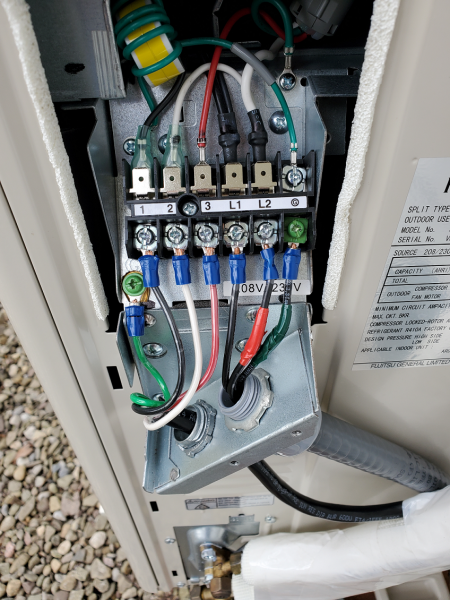
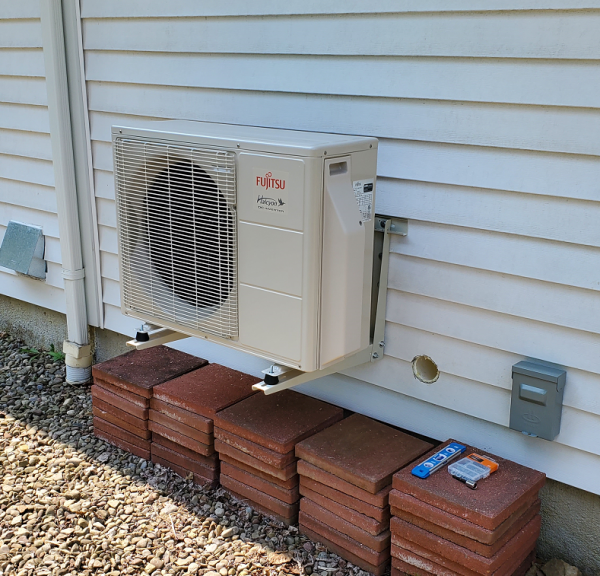
With the help of my dad, we installed an electrical disconnect box and ran conduit through the wall. The electrical requirements for this model are 240V with 15A protection. We mounted the outdoor unit on a wall bracket several feet above the ground so that it will remain clear of snow. Lastly, we fit a 3” pipe through the wall so that the line set and indoor wiring can passthrough and connect to the indoor unit. We then sealed the openings and tidied up the install.
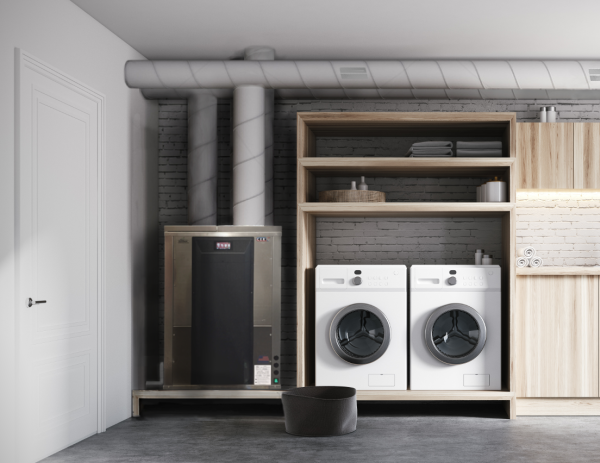
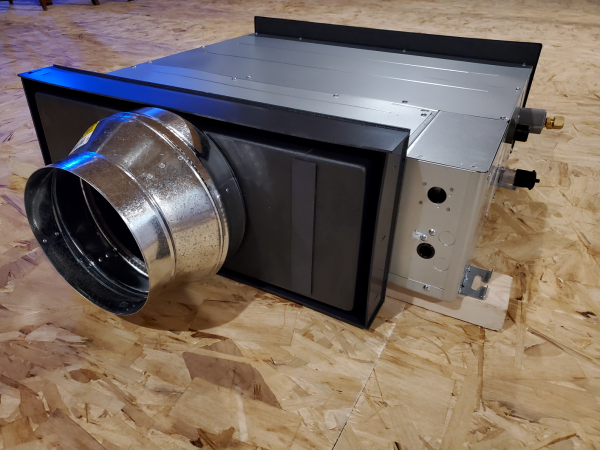
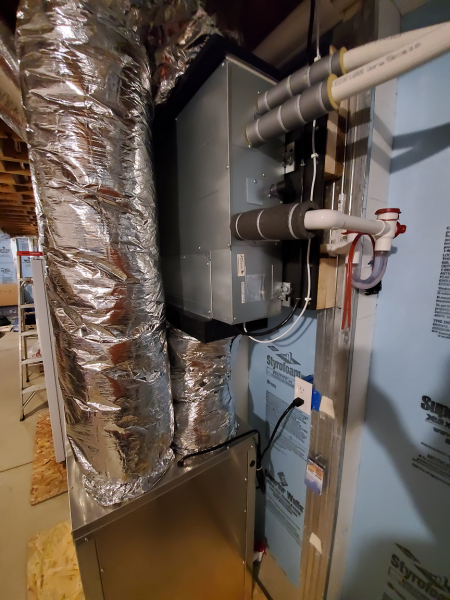
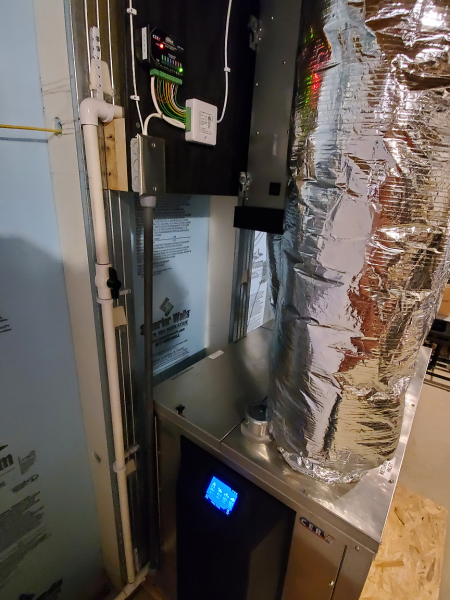
Next, we started working on the indoor ducted unit. I decided to mount the unit vertically, directly over the CERV2 to both save space and limit the amount of ducting rework. The original vertical duct work and duct heater were removed. We used bolts and rubber vibration dampening washers to mount the indoor unit to the wall. I went a little fancy and ordered plastic insulated plenums with round duct adapters. The alternative is to craft something of your own out of duct board or sheet metal. After a little bit of alignment, the indoor unit ducted in smoothly. We attached the drain line and made the final electrical connections. The line set was cut to a final length, the flaring tool and some Nylog made the copper connections tight, and all the locknuts were torque wrenched to the specifications. We successfully pulled a vacuum in the line set for several hours and felt confident to let the refrigerant flow!
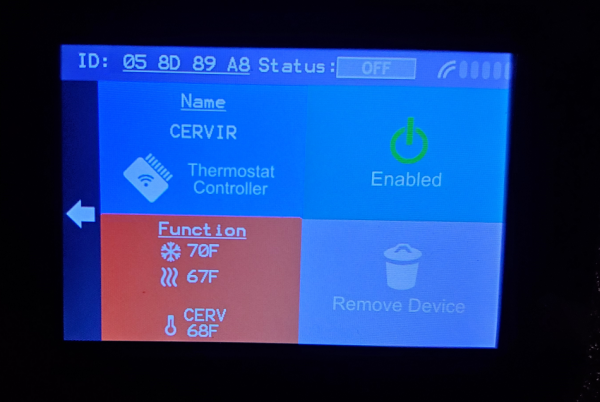
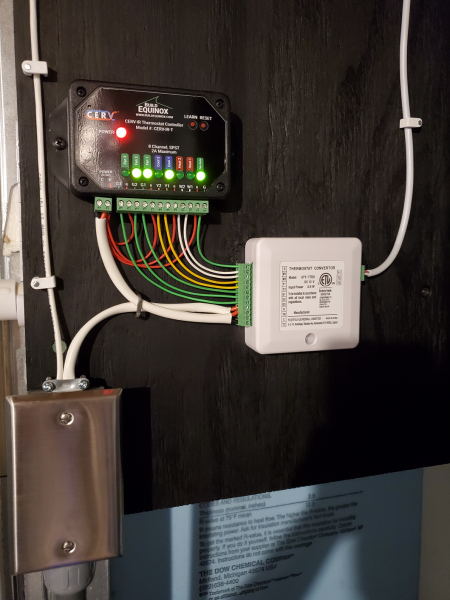
It was time to commission the mini-split, I used the included Fujitsu thermostat to run it through some tests. For the CERV2 integration I was provided a CERV-IR device that communicates wirelessly with the CERV2 and connects to the mini-split’s thermostat controller. This thermostat controller (purchased from Fujitsu separately) takes the signals the CERV2 sends and converts them into a digital language only the Fujitsu understands – it’s basically a digital middle-man. Both these units need power which I pulled from the CERV2’s transformer panel. An additional temperature sensor is inserted into the ductwork after the indoor unit and is connected into the CERV2’s motherboard. This sensor allows the CERV2 to optimize it’s heating and cooling algorithm alongside the mini-split’s.
So, how well did it work? Let me show you the results using the CERV2’s graphing data. The graphs show the 2nd half of August 2021. The solid red line shows when the mini-split was turned on. The top graph is temperature and the bottom graph is relative humidity. As the outdoor temperature rose the indoor temperature reached 74° F and 72% RH. After the mini-split was activated, the house settled down to 68° F and 64% RH. This might not seem like a big difference, but it is. The dew point was lowered from 66° F to 58° F and there was 30% less absolute humidity (measured in g/m3) – the actual amount of moisture in the air. This was achieved with the mini-split using between 10-15 kW/h per day.
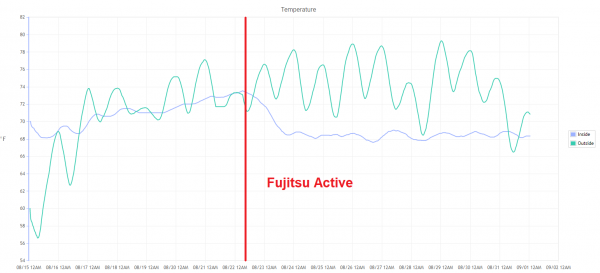
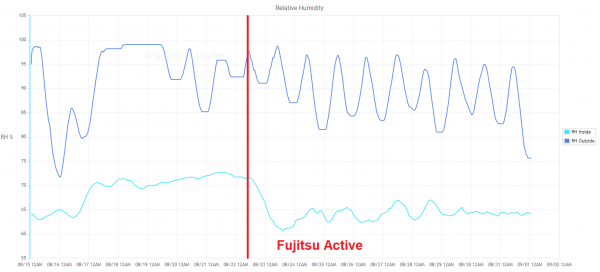
I am pleased with the combined summer-time capacity of the CERV2 and the ducted mini-split. I think it is worth spending the extra kilowatts in the summer to keep the house cooler and less humid. The kilowatts saved in the winter will far outnumber those used in the summer. We are now into the transitional months where additional heating and cooling are needed less frequently. I will have to end this article with a teaser… to be continued once the winter results are compiled. Next year, I will follow up with a new article to analyze how the combined system performed in the winter.
I want to thank the Build Equinox team for all their help, support, and advice. Ty visited me for a CERV2 checkup last year when he was passing through my area. And this summer, I was able to make a stop by the Build Equinox workshop to meet Ben and Alex. I was given an excellent tour and got to see their assembly lines, mini-splits, dehumidifiers, solar array, rain water collection, and chickens in action!
- Matthew Taylor

