We recently asked one of our customers in New York if he would be willing to share his experience on his DIY CERV2 retrofit, replacing a traditional Heat Recovery Ventilator (HRV). We are beyond pleased with Matthew's response, and he covers topics ranging from the installation process to indoor air quality monitoring features!
If you would like to showcase your home and experience with the CERV, we would love to hear from you! Fill out our Contact Form or send us an email!
CERV2 Testimonial,
Matthew Taylor
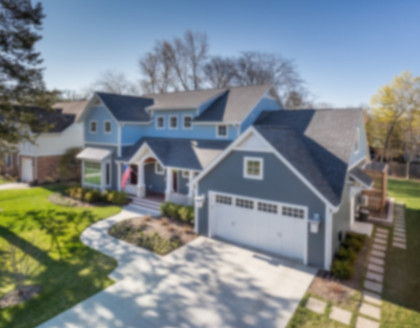
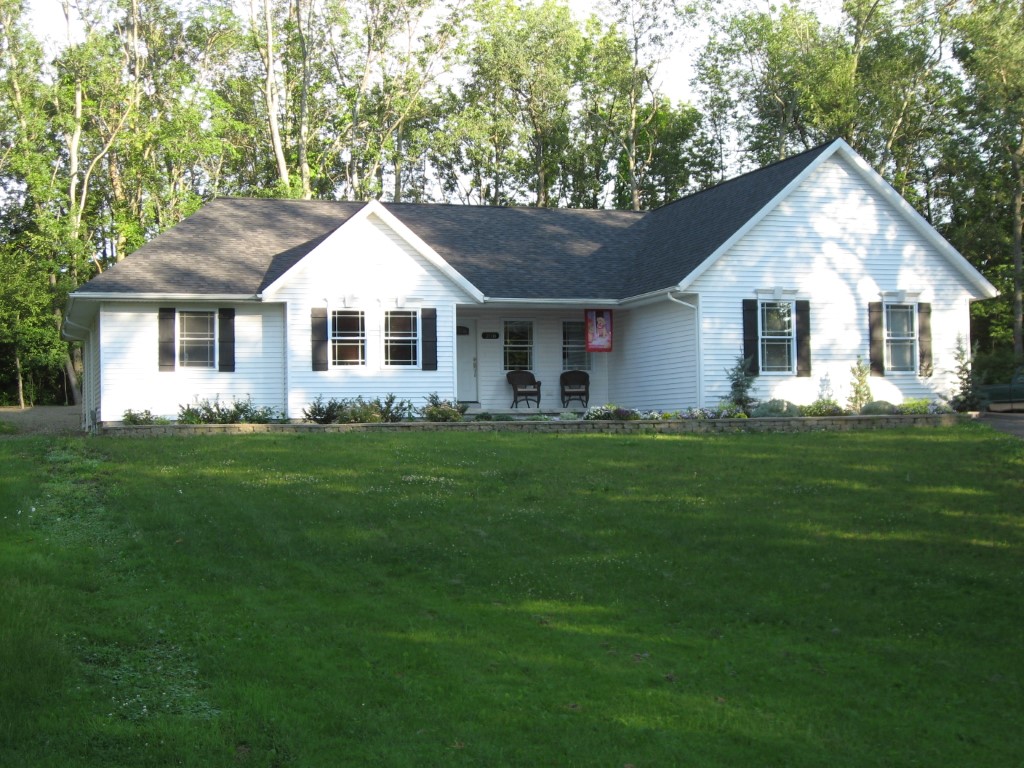
The Taylor home was designed and built in Western New York in 2009 by my dad, Gary. He was inspired to experiment with concepts used on Passivhaus buildings that he had read about being used in Europe. The major concepts being double wall + airgap construction, super insulating, avoiding windows on the east and west sides, fully insulated prefabricated basement walls, all electric appliances, and ventilation control with an HRV system. The final design of the home turned out to be a modest 2000 sq. ft. ranch that looks very traditional in appearance.
I have lived here since the house was built and then purchased it several years later. Overall the house does very well in the summertime requiring very little cooling with its R-30+ walls and R-80+ ceiling insulation. However, the humidity can become a problem and a portable A/C unit is sometimes utilized. In winter—with an average daily temperature range of 20-33°F—we had unconventionally used three oil-filled electric radiator heaters to heat a majority of the home. These units used an average of 2.5 kWh which equates to a heating load of around 8500 BTU/hr. I also had an HRV, except I rarely used it.
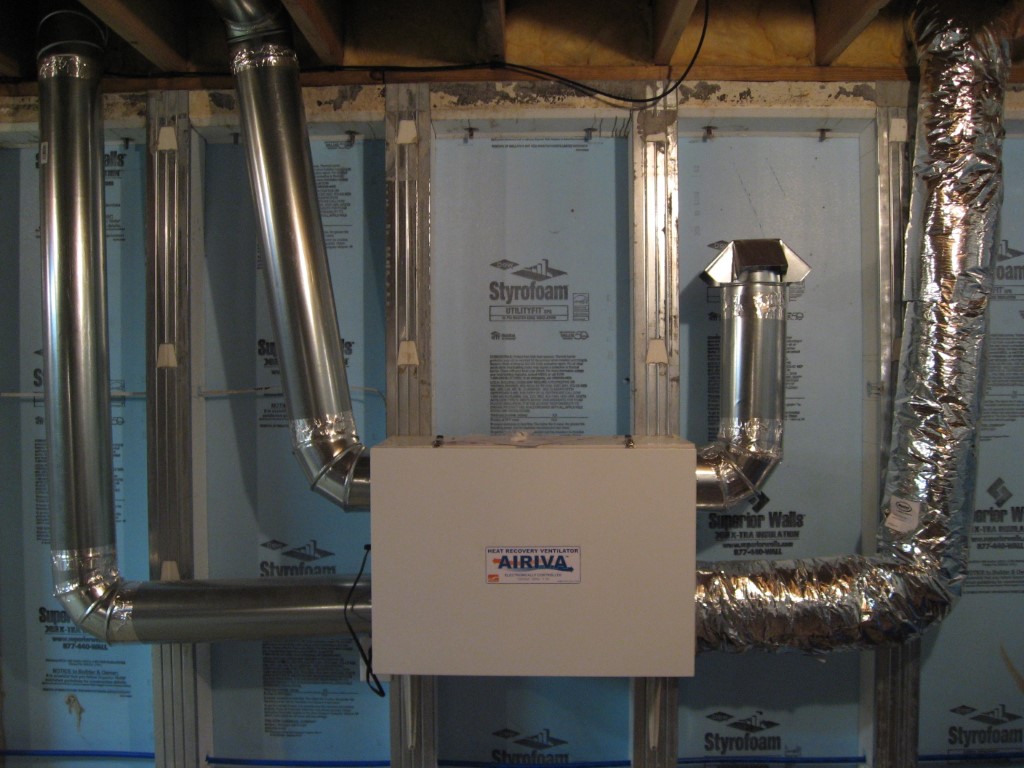
The HRV was rated at 100 CFM and could provide the house up to 13 air changes per day at 73% efficiency. However, there were several problems. Our install was less than desirable as it would take in stale air from the basement and pass the fresh incoming air into the living room only. The basement air was typically 10-15°F colder than the upstairs which further reduced heat exchange efficiency during the winter. The filtration system was of low quality and would allow contaminants to enter the house. The unit lacked internal frost control and would only operate below certain temperatures with an override toggled. Ultimately, I had an aversion to running it because it would almost always do the opposite of what I wanted. It would chill the house in the winter and heat the house and add humidity in the summer.
At the time, I did not fully realize the consequences of not running a ventilation system 24/7. Only two people lived in the home and everything seemed fine. But slowly over time I started to pick up on issues with the tightness of the house. First, I discovered the level of radon was 10 times higher than the EPA recommendation in the basement and 3 times higher than the recommendation upstairs. I helped to mitigate this with a sump radon fan. Second, I started noticing problems with the air quality in the bedroom. I would wake up with headaches, stuffy noses, and/or general grogginess quite frequently. I purchased a CO2 meter and found that when we slept, with the door closed, levels would often exceed 2000 ppm. After this I knew I needed a better ventilation solution and started to research options. I ultimately decided to make a major retrofit and perform a DIY install of a CERV2.
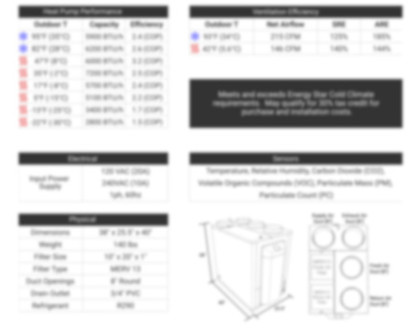
I looked into traditional furnaces and whole house external heat pump solutions. However, I felt these would be oversized for my needs, and they often required equipment to be maintained outside, and most would not completely solve the issue of ventilation. I decided to stay focused on searching for a HRV/ERV system. I was surprised at the lack of technology in widely available units. However, Build Equinox’s CERV2 stood out as an outlier with its innovative self-contained heat pump approach to energy recovery. It also featured real-time temperature, humidity, CO2, and VOC monitoring. The ability to add wired and wireless connected devices and switches. Plus internet connectivity to control and view analytics from a web app.
I really liked the concept of the unit being able to intelligently switch from ventilation to recirculation based on real-time indoor and outdoor conditions. This turns out to be the biggest energy saver since the unit can quite often operate in recirculation modes when indoor conditions are healthy. The heat pump conditions the indoor air by adding or removing heat and humidity. I calculated that even at an outdoor temperature of 17°F, the CERV2 in recirculation heating mode would handle 30% of the house’s heating load and at an outdoor temperature of 45°F it would handle the entire load. It also boasted quiet fans rated up to 300 CFM (3x the HRV) and featured fully enclosed filter boxes, unlike the HRV. Being someone who likes to try new technology, the CERV2 seemed like a smart replacement so I went ahead and ordered one. I also decided to order a modulated 5kW supplemental auxiliary duct heater so that I could ditch the radiator heaters and make the house a bit safer. (The 2.5kW model would have been enough for nearly any situation but the extra cost for the 5kW model was insignificant so it made sense to oversize and it will feel good on that rare -15°F night.)
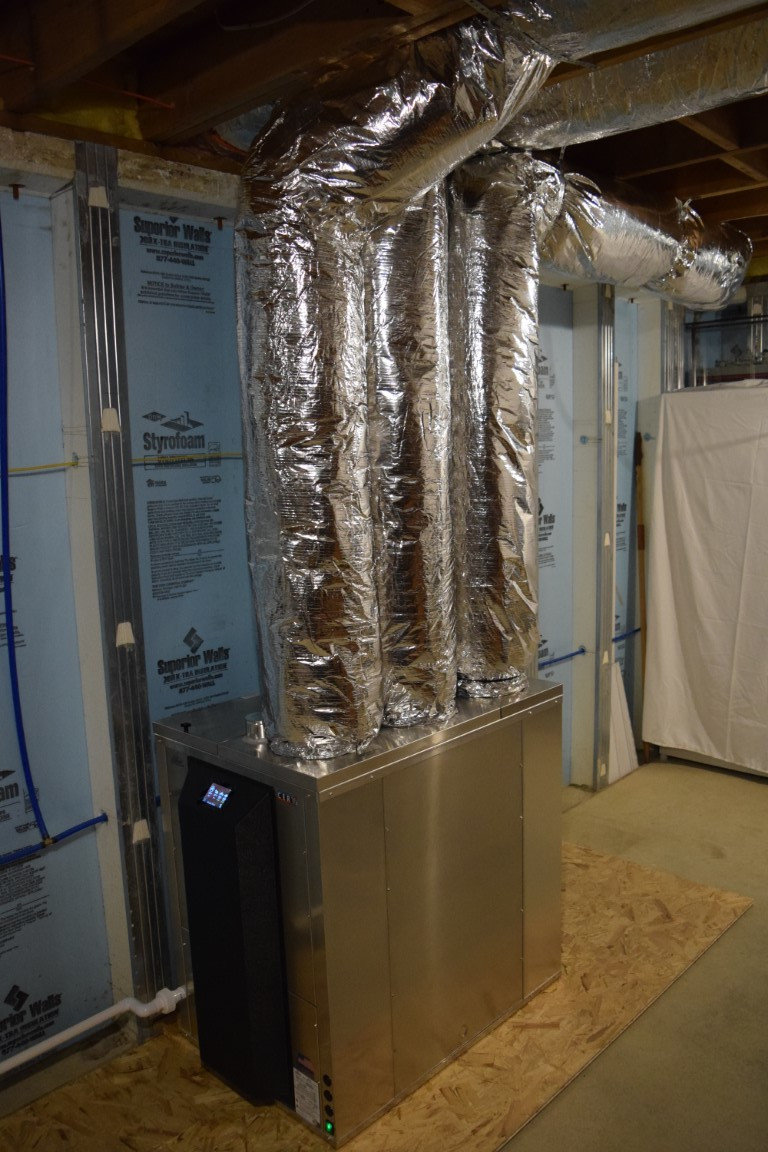
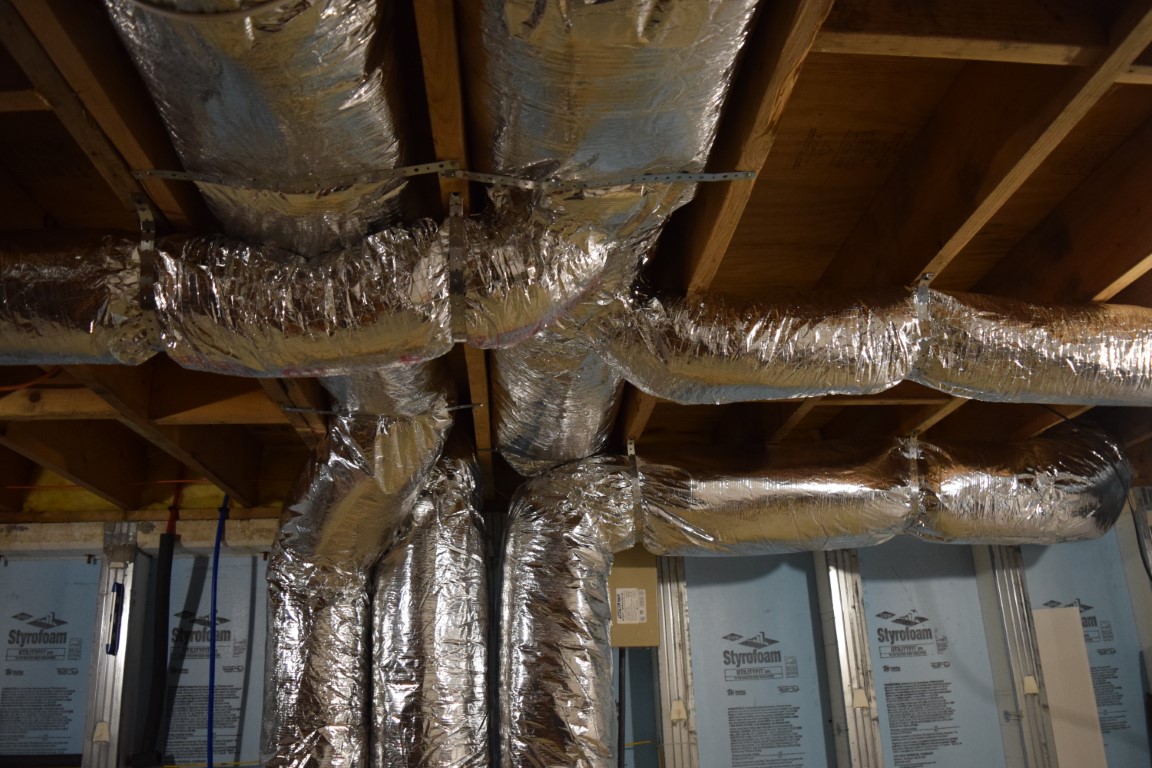
The most challenging part of this retrofit for me was designing and building out the new duct system. I knew this was going to be a difficult task and something I had to learn a bit about as I went along. Ben Newell from Build Equinox was a really big help and patiently answered a lot of questions I had before and after the sale. My basement is partially finished so I had to carefully plan my duct layout around it. I also had to accept a tradeoff of putting all the registers on the floor. I found a helpful piece of software called Ductsize that determined the best size ducts for my layout given the desired CFMs for each room. This sizing keeps static pressure low and the fans operating efficiently. I targeted 225 CFM, but this includes two rooms in the basement that I plan to mostly keep off unless in use. Therefore, I push about 175 CFM through the system when the basement is not in use which means I run the fans at about 60% speed.
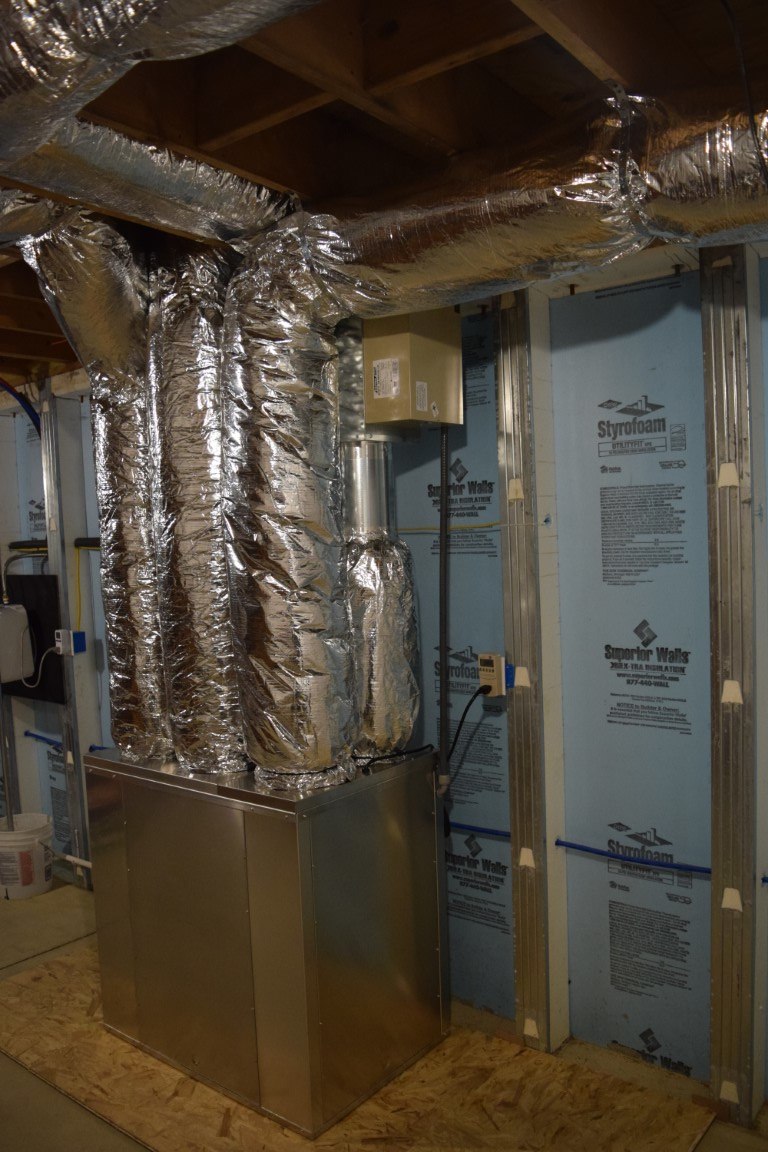
After enlisting help from my dad we started resizing the existing HRV outdoor intake and exhaust lines. This was the most difficult part and required a reciprocating saw, patience, a siding removal tool and a can or two of expanding foam insulation. For all ducts, except the return air line, we used R-8 insulation to prevent condensation and heat loss. We used runs of R-8 acoustic flex duct for all take-offs from the main branches. I decided to insulate the return air with R-6 because the unfinished basement areas are much colder than the rest of the house. While this is optional I felt it could be a benefit in the winter. A beginner tip: I found that using take-off ‘wye’s work best for the fresh air lines and take-off ‘tee’s work best for return air lines. Sheet metal snips and a crimping tool are must haves to make connections easy and in the right direction—crimps should be in the direction of airflow as much as possible. I sealed all joints and elbows with foil tape but Mastic compound works well too. The last part was cutting holes in the floor and again the reciprocating saw came in handy. I installed higher quality registers with metal dampers to help balance the system although I found I needed very little adjustment. Others may want to install dampers in the duct. There is also a need to install a PVC condensate drain line, which I gravity feed to the sump pit. I also wired a dedicated GFCI outlet for the CERV2. Overall, the install took us about 4 days.
The auxiliary duct heater was easy to install. I mounted it above the supply air and strapped it with hangers to the floor joist to keep the weight off the CERV2. The 5kW heater requires a 10-2 wire run to a 30A breaker. A temperature sensor is installed into the duct a few feet past the heater and controls the rate of modulation. The target temperature can be adjusted up to 140°F—but I recommend no higher than 125°F or micro-particles can start to burn and smell. Finally, a 24VAC control wire was run from the heater to the CERV2. I used flexible PVC conduit and 14AWG wire. I drilled a knockout into the back corner post rather than running conduit to the front knockouts. Ben advised me that the panels can be easily removed to run the wire through the back. This worked out really well and made for a clean look.
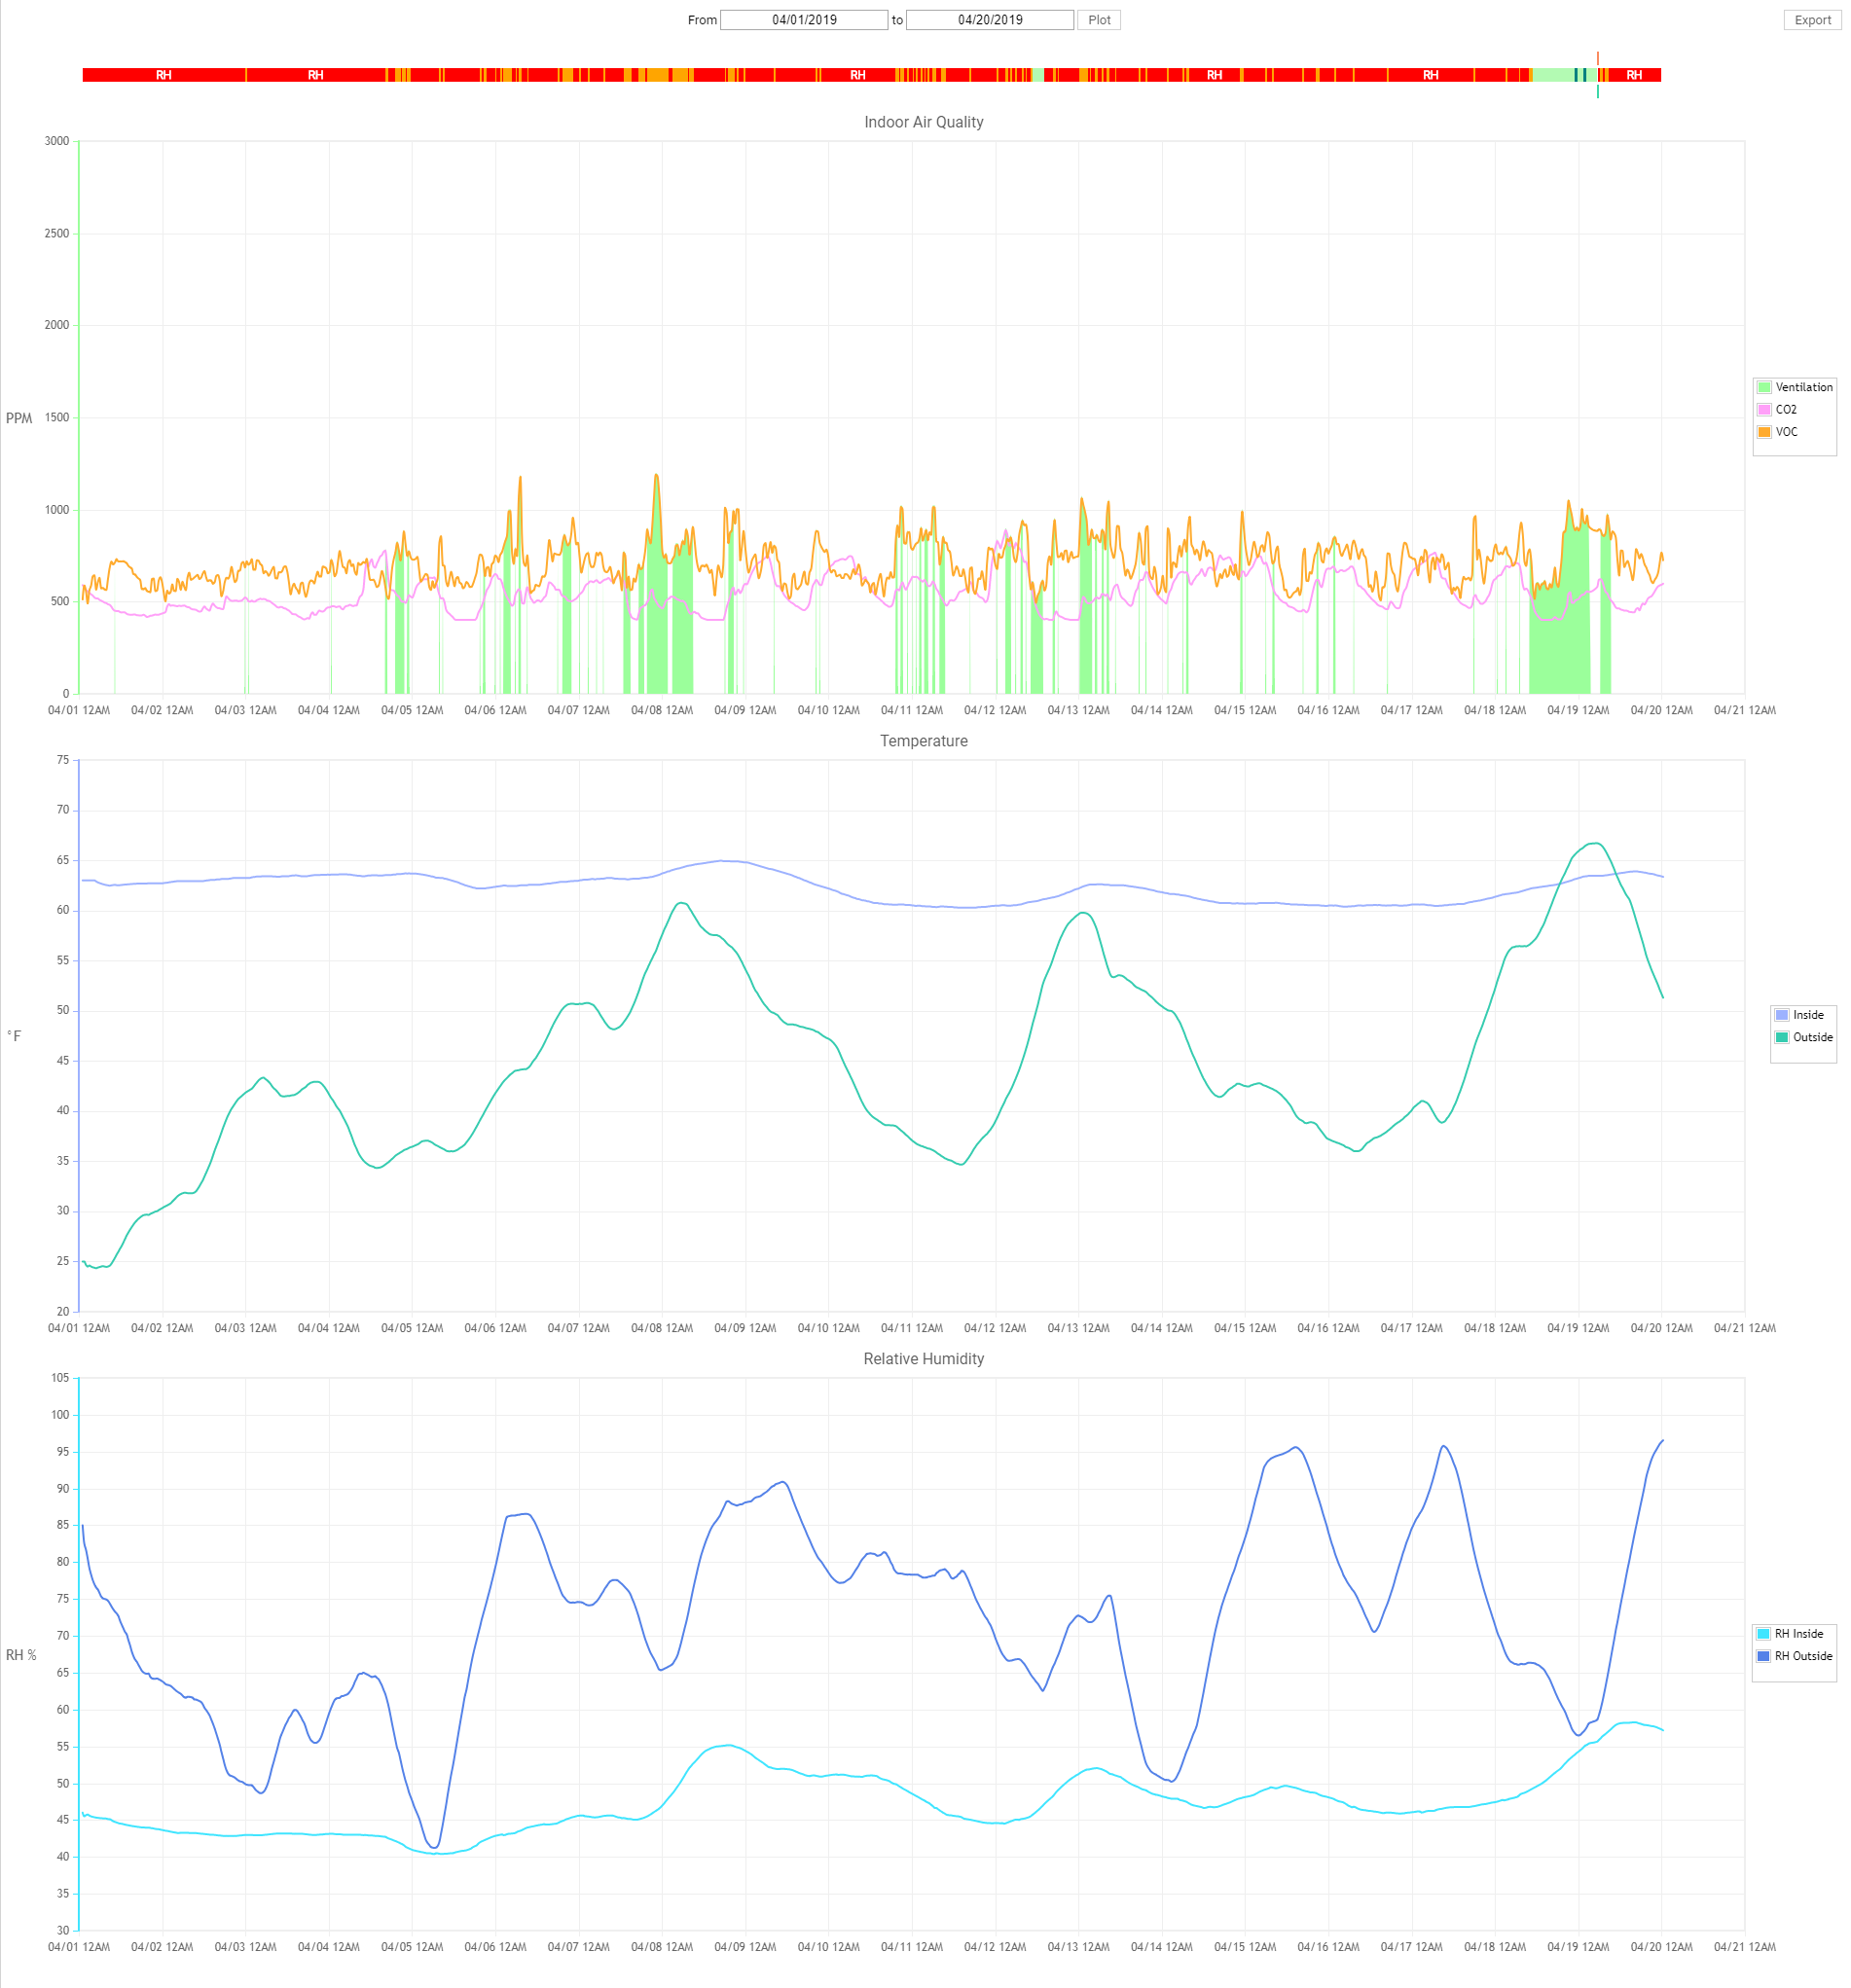
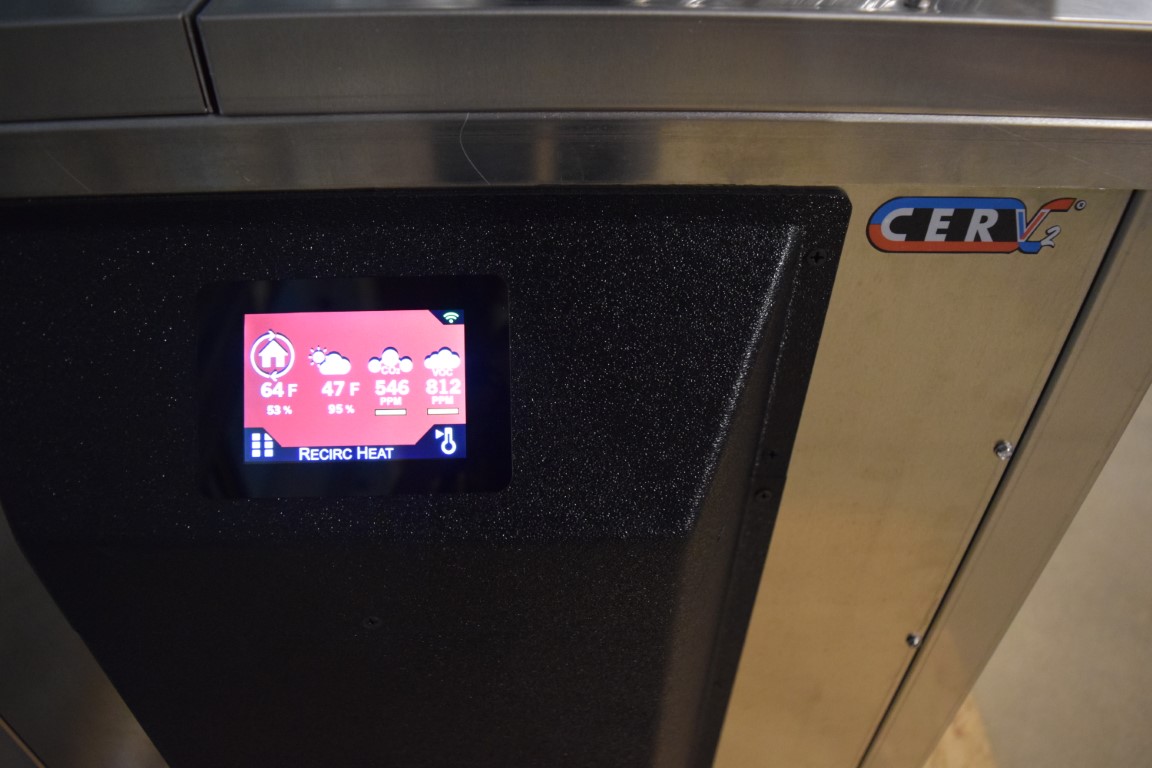
The results speak for themselves, literally! With the app you can see the results of running the CERV2 for nearly a month. CO2 levels average around 550 ppm and are rarely above 750 ppm. I have verified this with an independent CO2 meter. VOC levels have been kept mostly below 1000 ppm with an average of 700 ppm. I admittedly was never very conscious of VOCs and there are potentially many sources in the home. It is great that the CERV2 can detect these and work to keep them as low as possible.
One of the side effects of having all the registers on the floor is that the indoor temperature reads about 5°F low. I adjust my set points accordingly and set the auxiliary heat turn on at 60°F (which is about 65°F at middle height in the room). From the graphs you can infer where the auxiliary heat kicks on to keep the temperature above 60°F and this is happening when the outdoor air temperature is below 45°F. I am told that an incoming update to the app will show exactly when the auxiliary heat was on. Humidity has been within acceptable levels but are mostly at the mercy of outdoor levels when the CERV2 is heating. When the CERV2 begins to cool I expect to see humidity a bit more managed.
Power consumption wise, I have been running the fans at 60% with the heat pump active. This uses between 350 – 450Wh depending on the outdoor temperature which equates to $30 a month at $0.11/kWh. The heat pump has a COP above 3 at these temperatures so I am getting at least 600Wh for ‘free’ that I normally would have paid $50 a month for.
Overall, I have been really happy with the performance of the CERV2. The build quality on the unit is outstanding. There is a noticeable improvement in the quality of indoor air and our health. The temperature throughout the house has been more consistent. I have not woken up with a stuffy nose or a headache since commissioning the system. I even stopped running a small HEPA fan in the bedroom. Cooking smells no longer linger for hours. Hairspray in the bathroom is quickly detected and vented. My parents spent the night in the guest bedroom and commented on a more pleasant temperature and better sleep. I am excited to see how it performs this weekend when I host 14 people for Easter.
Looking forward, I plan to continuously make ‘greener’ improvements to the house. The CERV2 is a cornerstone and will continue to stand as the brain of the house. I plan to look into heat pump dryers/water heaters, solar panels, geo-loops, and possibly re-ducting bathroom fans. With these enhancements, I know that the CERV2’s performance can often be improved further and its potential for extensibility can be realized.
- Matthew Taylor
Post Easter Update
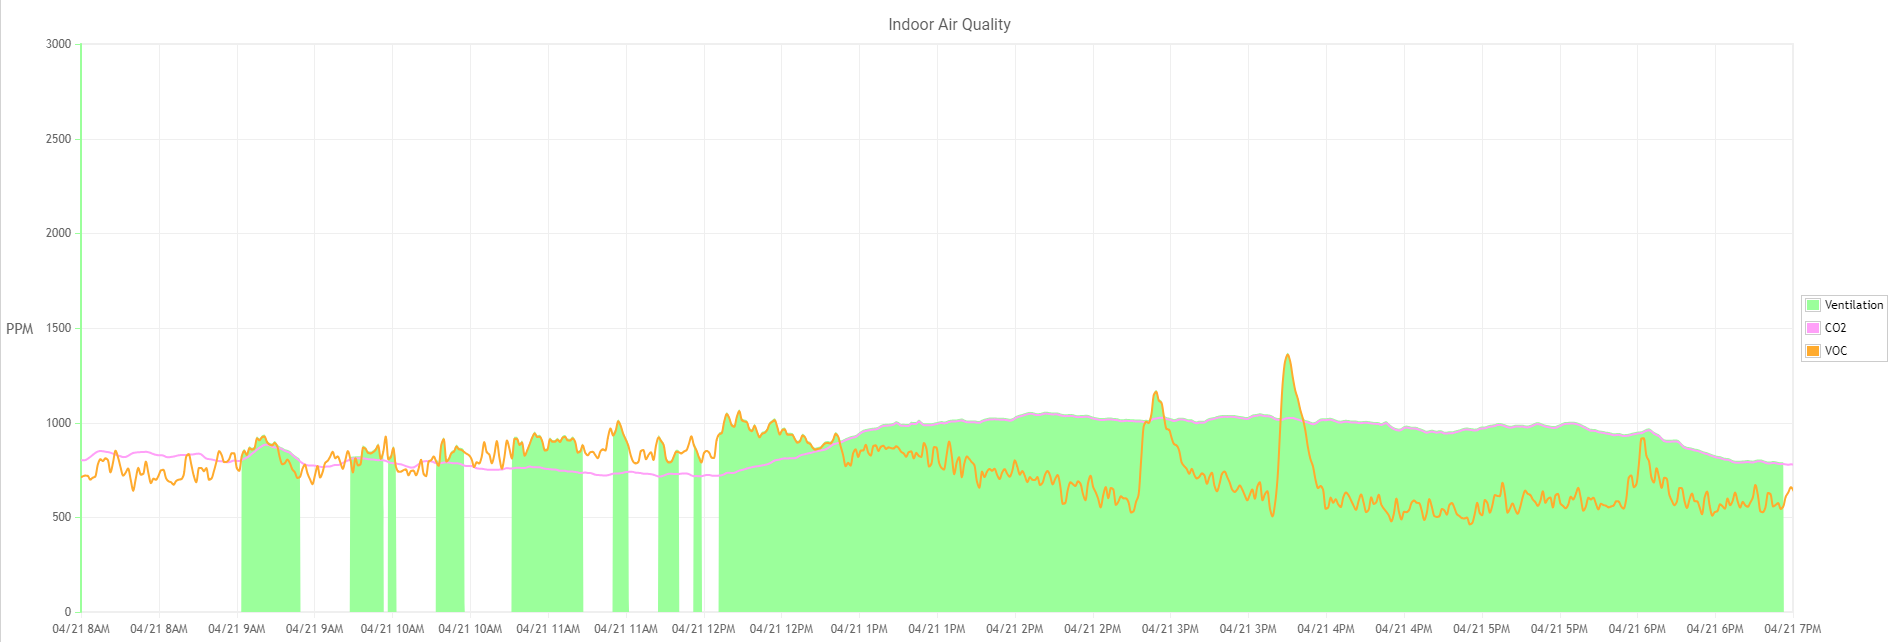
After I wrote this article I held my first large family gathering since installing the CERV2. I had 14 people over for Easter. Here’s a look at the air quality data. I started cooking around 9AM and you can see a few ventilation events occurred throughout the morning. At noon guests started to arrive and CO2 levels began to increase. I increased the fan speed to 100% to ensure maximum air circulation. CO2 was held to 1000 ppm. As a comparison, the last time I had this many people over my independent CO2 meter read 3000 ppm and that was with the old HRV running. VOC levels during this same time period were mostly low but two events triggered a rapid spike. I don’t know for sure what caused these but I suspect it might have been perfume or some sort of chemical sprayed in the washroom. However, the VOCs were vented and fell back to normal. As guests began to leave around 6PM the CO2 started a decline back to normal. The CERV2 performed as expected and kept air quality at reasonable levels given the amount of people. It was a great family gathering and I’m happy to have provided a healthy home for my guests!
- Matthew Taylor



 click to view full image
 click to view full image

 click to view full image
